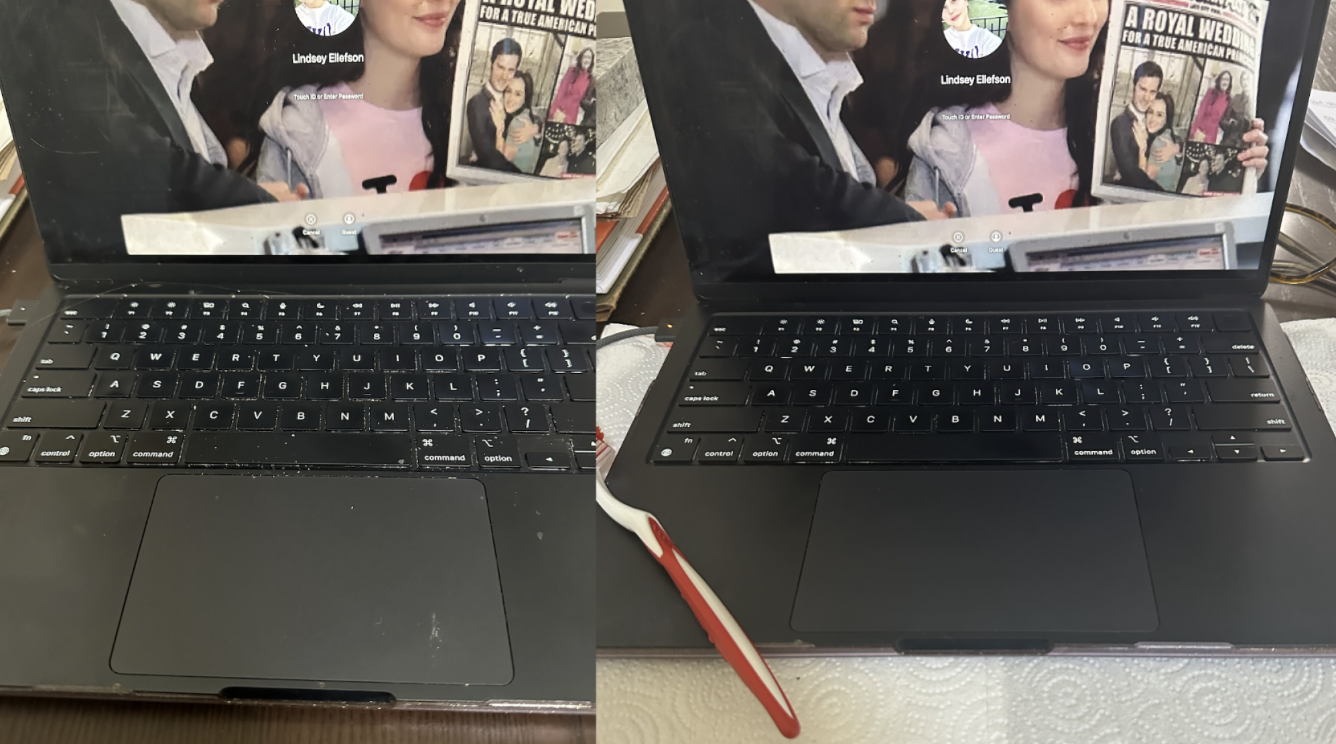
My keyboard, perhaps like your keyboard, gets rather dirty. From working on it and traveling with it to eating food over its precious surface, it is my fault debris accumulates among its keys. And yet, I don’t have a compressed air canister or a keyboard cleaning kit on hand. To rectify this situation, I spent a little time looking at quick and easy keyboard cleaning hacks, and found what worked best for me.
Clean your computer keyboard with the humble toothbrush
After much searching, I discovered there are two often-recommended methods for cleaning keyboard crevices in the absence of compressed air: One involves using an old toothbrush, and the other involves a small, soft brush, such as a makeup brush. I have both of those items easily on hand, but I recognize a sizable chunk of people will not have quick access to a makeup brush, so I opted for the toothbrush.
My concern was that if I got the toothbrush a little wet, it would damage the keyboard, but after reading more, I learned that solid debris, like crumbs and dirt, can be removed easily with dry bristles. I would only need to wet the brush if I came to any sticky spots.
First thing’s first: Turn your computer off and disconnect its charger. I also laid down a paper towel to catch any dirt. I started by thinking I could just quickly sweep the toothbrush across the keyboard and the bristles would catch and dislodge dirt, but this was not the case; I had to go row by row, angling the brush so the bristles were taut and the tip dipped into the tiny spaces around each key. This took longer than I anticipated and each row required multiple swipes and drags of the brush to get all the crumbs out. It did work, though: Crumbs started piling up in the gaps between key slots and I was able to brush those easily onto the paper towel.
Unfortunately, it didn’t work as well as I’d hoped. I ultimately did have to wet the bristles ever so slightly and try again. I put five droplets on the brush. (Yes, I counted. I live to serve my readers and this computer cost a lot of money, so I didn’t want to cause any damage.) Then I shook it out a bit and felt it to be sure it was just a little damp. From there, I repeated my process of dragging the tip along the rows and noticeably more dirt became dislodged. Once I’d collected several piles of debris, I wrapped my toothbrush in a wet wipe and swiped them up. It looked much better, but when I turned the computer back on, the backlighting on my keyboard revealed a few crumbs that hadn’t been eradicated. I dry-brushed these, which was much easier with the light coming from behind the keys, and pushed them onto my paper towel. You can see my ultimate keyboard-brushing result at the top of this page.
Keyboard cleaning conclusions
Overall, this worked great, though it was more time- and labor-intensive than I was expecting. It requires precision, patience, and focus, but it’s time well-invested.
When pitching this story, Lifehacker managing editor Meghan Walbert let me know that she uses a Q-Tip for routine keyboard maintenance. She says when used regularly, it can remove dust from around the keys, preventing that debris from eventually falling into the cracks and requiring more effort to remove. Consider keeping some Q-Tips on hand for spot cleaning between sessions with the toothbrush.
If you want to pursue the toothbrush method, there’s one more thing to keep in mind: Some brushes are better for this purpose than others. I used what I had on hand, which was one of the ones with extra-large rubber bristles surrounding the normal bristles, and I don’t recommend that. Rather, look for some with hard, firm bristles and no extra rubber or silicone parts on the head, like these. If all you have is the kind with the rubber bits, don’t dismay. I was able to do this just fine with one of those, though it was a tad more challenging.
