Phone notifications are tricky to balance: too many of them, and you’re constantly distracted by buzzes and pings. Too few of them, and you risk missing something important, from a relative in trouble to a great deal on headphones (two ends of the importance scale there, but you get the idea).
Over the years, Apple and Google have tweaked and refined the notification systems built into iOS and Android, but there’s still room for improvement. The native features that are currently in place work fine, but lack the sort of granular control you need to properly manage the alerts you want and the alerts you don’t want.
Enter BuzzKill: It’s Android only (sorry, iPhone users), and it’ll cost you $4, but it does a fine job of managing notifications for you. It hits the sweet spot to give you a powerful set of options to manage without feeling overwhelming or cluttered, and it just might be the notification solution you’ve been looking for.
Unfortunately there’s no free trial to take advantage of, though the developer does promise to refund you your money if you’re not happy with the app—and as I take you through some of the features it offers here, you should get a good idea of whether or not this is an app you’re going to find useful on your own phone.
Creating rules in BuzzKill
Credit: Lifehacker
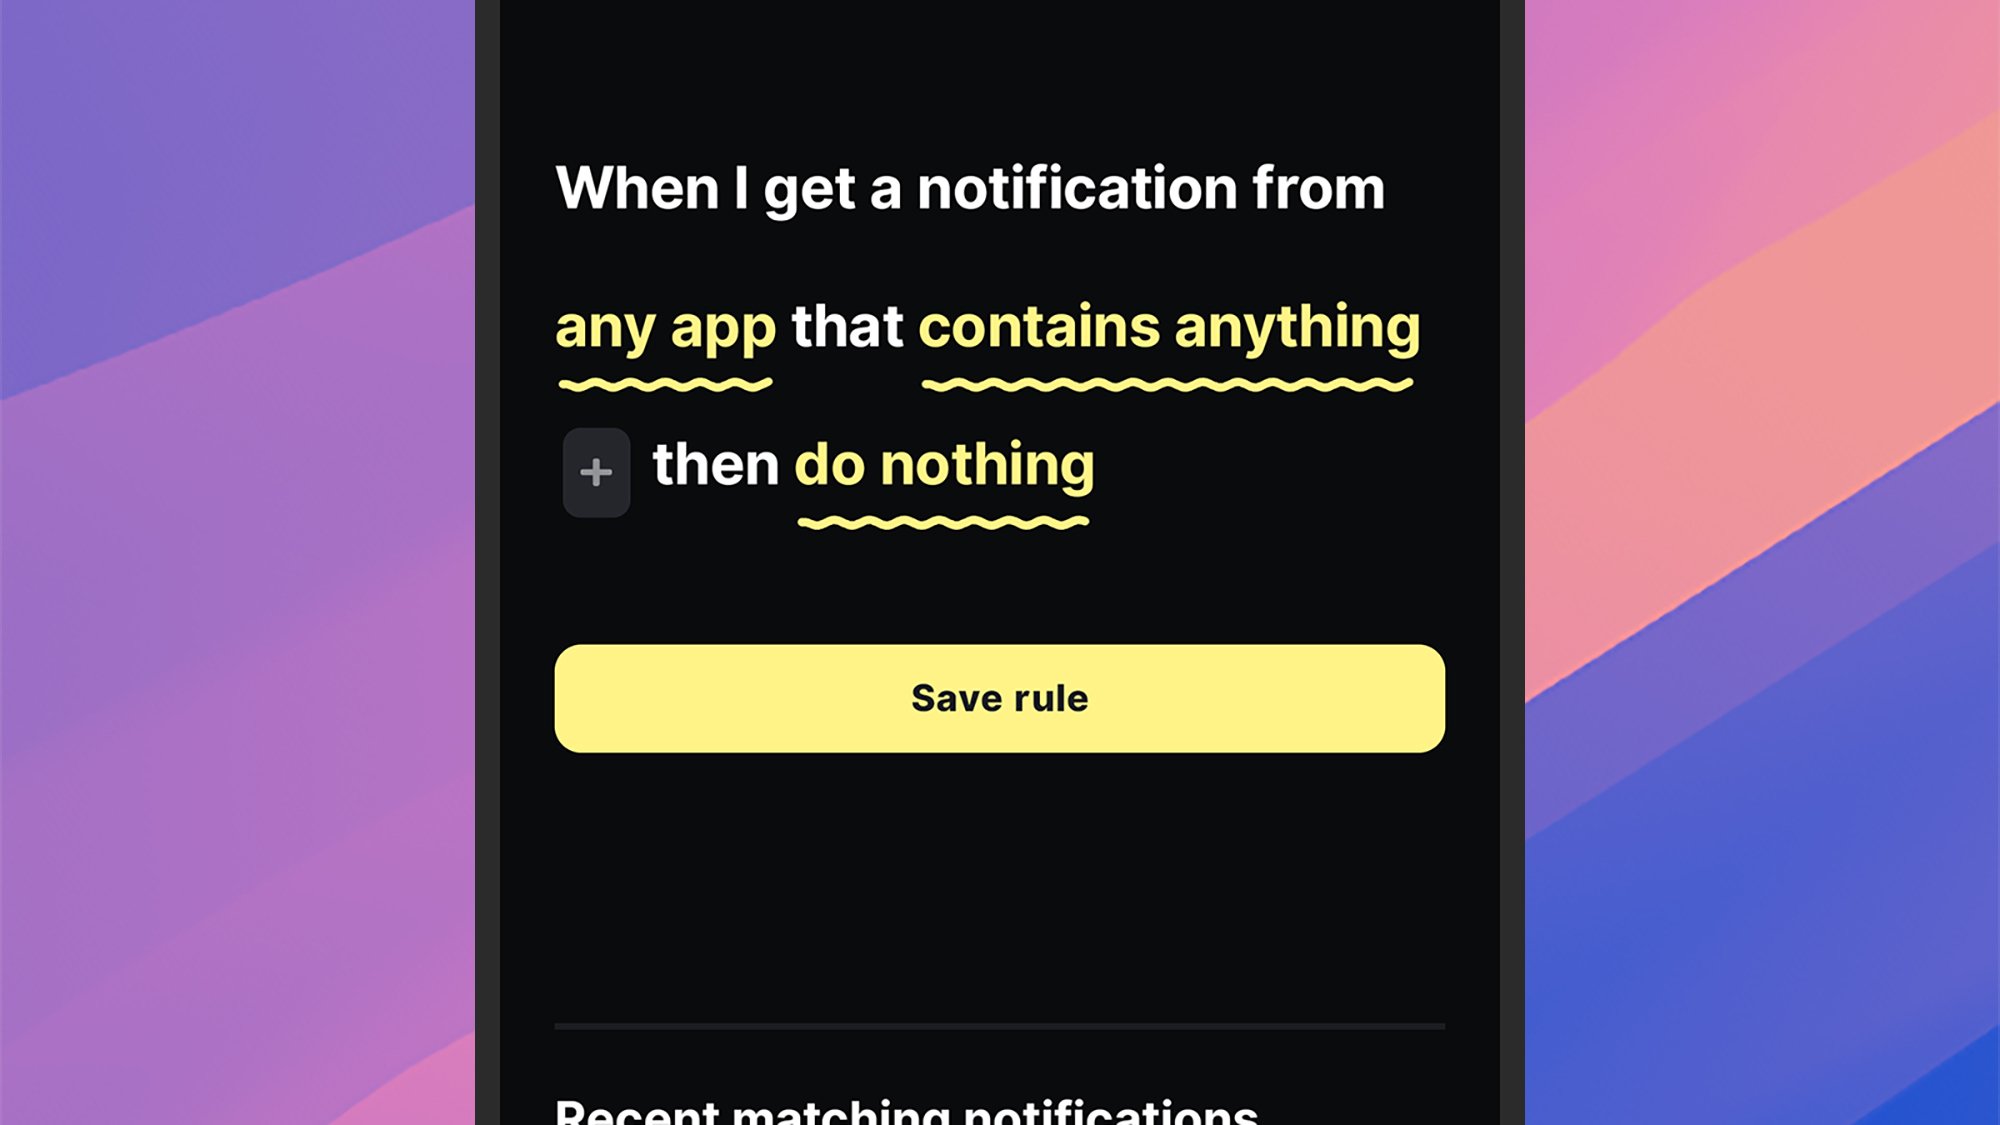
Load up BuzzKill for the first time, and once you’ve given it the necessary permissions to run in the background and access your notifications, you’re ready to add your first rule: Tap on Create rule to do this. That then leads you to a rule builder that will look familiar if you’ve ever attempted to set up filters for your email.
There are two parts to each rule: how to identify the notifications that qualify it (tap any app and contains anything to specify the criteria), and then the action to take for matching alerts (tap do nothing to set an action). To begin with, you’ll need to pick a specific app— whether it’s Uber, WhatsApp, or anything else you’ve got installed—and you can select multiple apps per rule.
You can leave a rule to apply to all notifications from your chosen app(s), or you can specify further filters. BuzzKill is able to look for words or phrases inside notifications, plus certain notification attributes for the notification—such as whether or not it has an image in it, or whether it’s from a group conversation (handy for those group chats).
You can build up some quite complex filters this way, and it’s even possible to nest certain criteria in sub-groups. You can ask BuzzKill to match all the filter rules you’ve listed, or just some of them (so a rule might be applied to messages from group chats or with images in them, or only when both of those criteria are met, for example).
All you then need to do is specify the action that BuzzKill needs to take, and it’s here that the app really proves its value. You can do everything from mute an alert, to make sure it’s unmuted even if your phone is silenced—so BuzzKill is useful for getting your attention for important notifications as well as reducing distractions from more minor ones. You can also invoke popular automation tool Tasker from BuzzKill for even more control.
Managing rules in BuzzKill
Credit: Lifehacker
Once you’ve started creating rules in the app, they can be managed from the Rules tab: Simple toggle switches let you enable or disable them, and you can also delete and duplicate rules by tapping the three dots in the top left corner of the rule box.
Over on the History tab, you can see stats relating to all the notifications that have come in on your phone, with filters and summaries available if you need them. One handy feature on this screen is the option to create a new rule based on a notification you’ve already received: Just tap on the notification and pick Create rule.
The Explore tab gives you some examples of what BuzzKill can do, and it’s a great resource for finding inspiration. For example, you can set up automatic replies to incoming messages, or snooze alerts that arrive together in quick succession, or create a custom vibration for communications from a particular contact.
Head to the Settings tab and you can play around with some of the app options. From here you’re able to give BuzzKill control over persistent notifications that stick around in the status bar, and create shortcuts for quickly triggering rules from the home screen or the quick settings panel on Android.
I’ve found BuzzKill most useful for shushing apps that I don’t particularly want to hear from during the day, without losing those notifications altogether—above and beyond the features that you get with Android itself. Creating and managing rules is also straightforward, and there’s an export tool for moving them to another device (BuzzKill is particularly privacy-conscious, and doesn’t connect to the web).